Azure Hints and Tips: Application Gateway Configuration with Multiple Backend Pools
Contents
- Introduction
- Prerequisites
- Step 1: Create an Application Gateway with Initial Backend Pool and Listener
- Step 2: Add Additional Backend Pools and Listeners
- Extracting the SSL Certificate from an Existing Virtual Machine Web Server
Introduction
When you are working with Azure Application Gateway, you may need to configure multiple backend pools to route traffic to different backend services, for example to web apps hosted on different VMs or App Services etc.
This quick guide will show you how to configure an Application Gateway with multiple backend pools and listeners, including using separate SL certificates for each listener. Using separate certificates is not necessarily the best practice for all scenarios, as a wildcard certificate can be used to secure multiple subdomains, but if that is not possible due to different domain names being used for each backend service, or, as in this case, simply because this is how the customer does things, then this guide will give a high-level overview of how to configure it!
Prerequisites
- An Azure account
- An Azure VNet with a subnet dedicated to the Application Gateway
- Backend services that you want to route traffic to, such as a VM, Azure Function, or App Service
- SSL certificates for each backend service (see below for how to extract an SSL certificate from an existing web server)
- A domain name and access to the DNS records
Step 1: Create an Application Gateway with Initial Backend Pool and Listener
In the Azure portal, follow the basic steps to create a new Application Gateway:
-
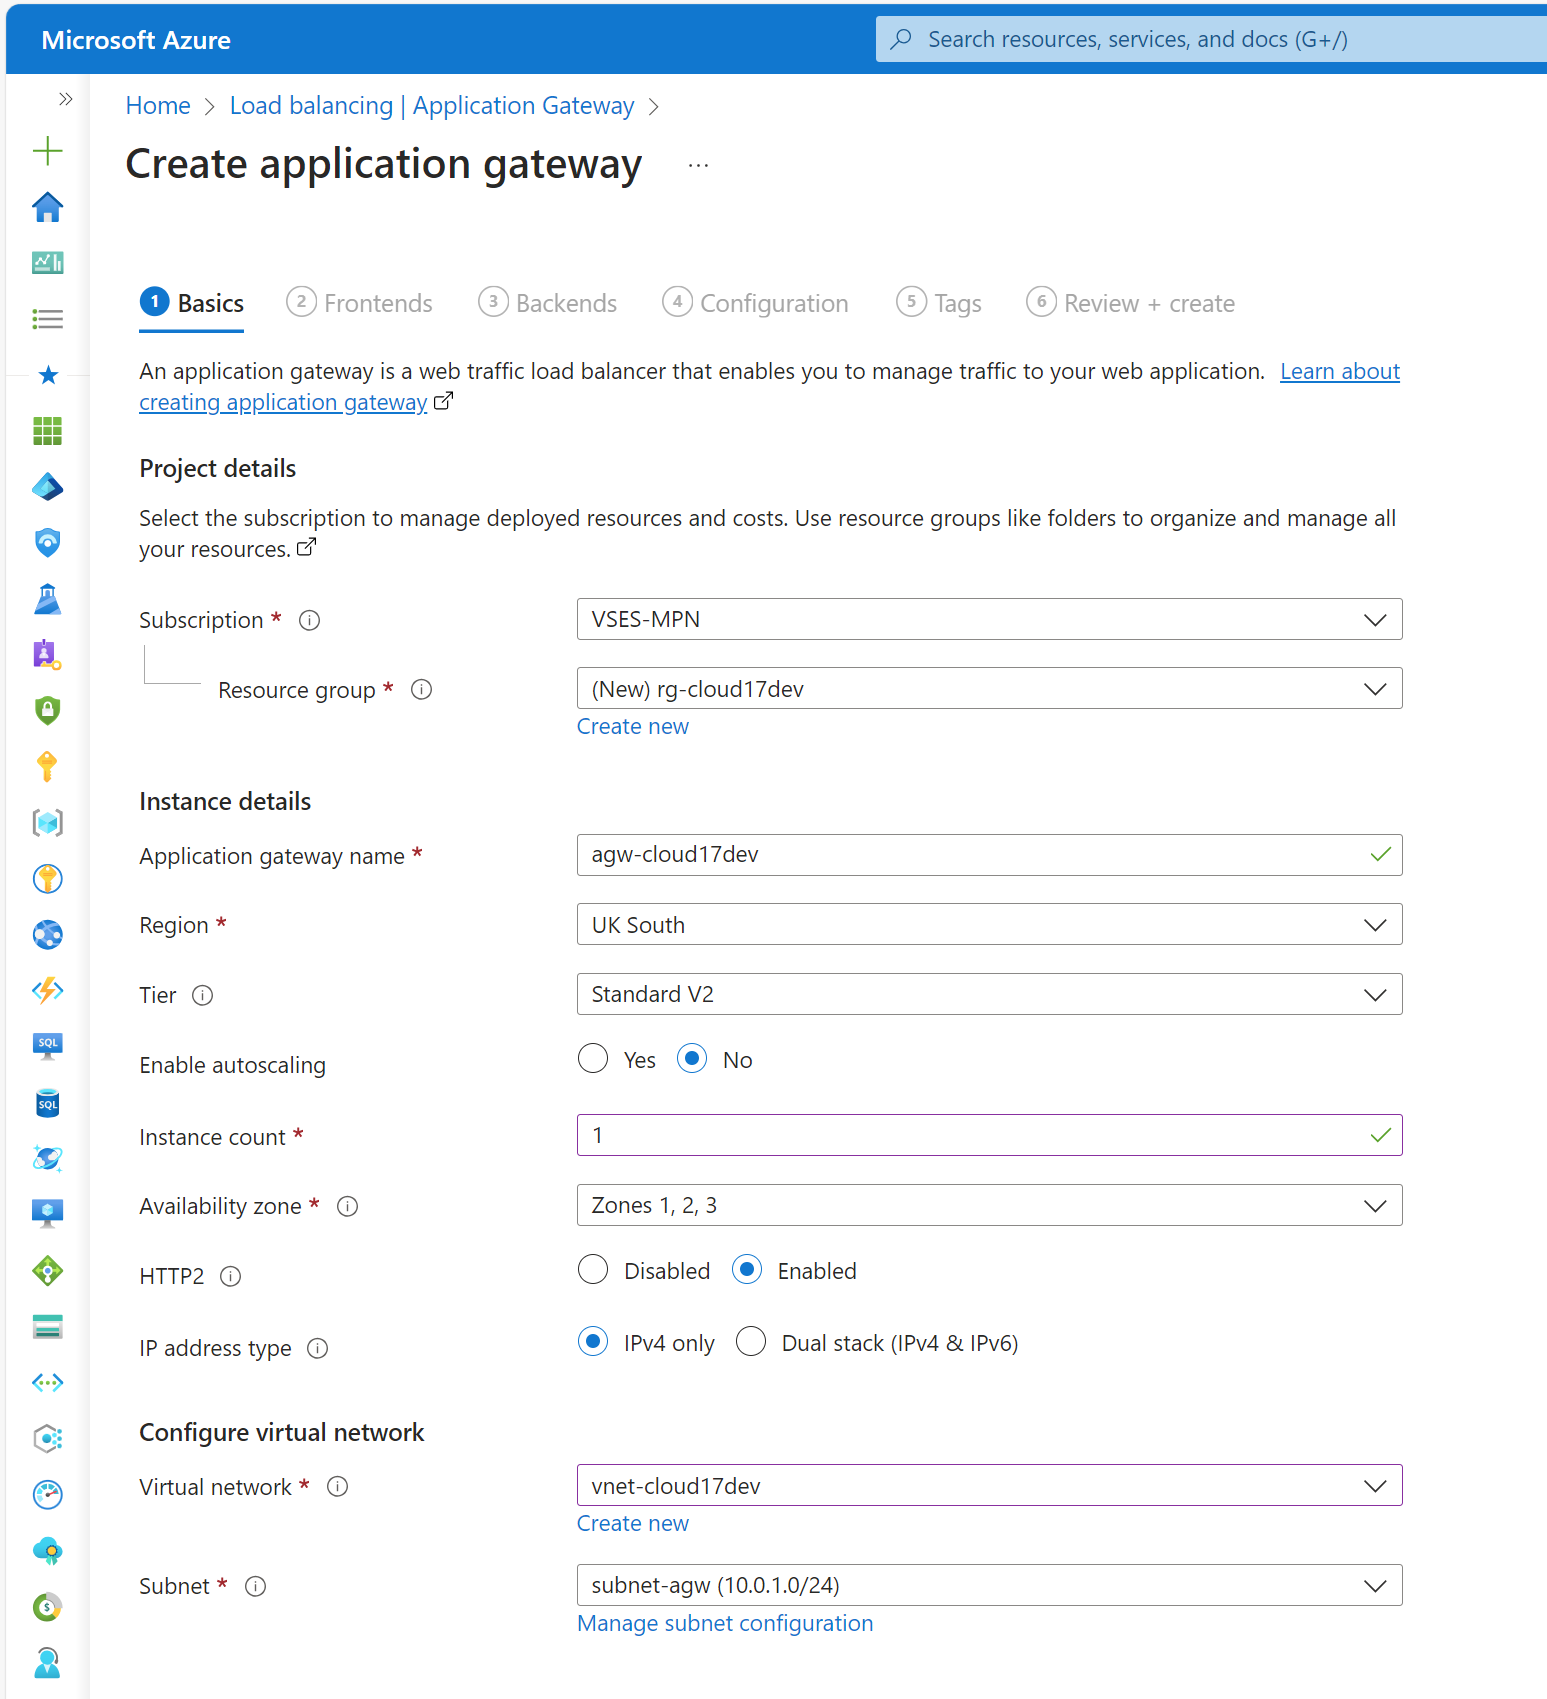
In the Basics tab, select the subscription, resource group, name and region, and choose a Standard V2 tier. If this is a training, PoC or other non-Production environment, you can remove the autoscaling configuration and reduce the instance count to 1:
-
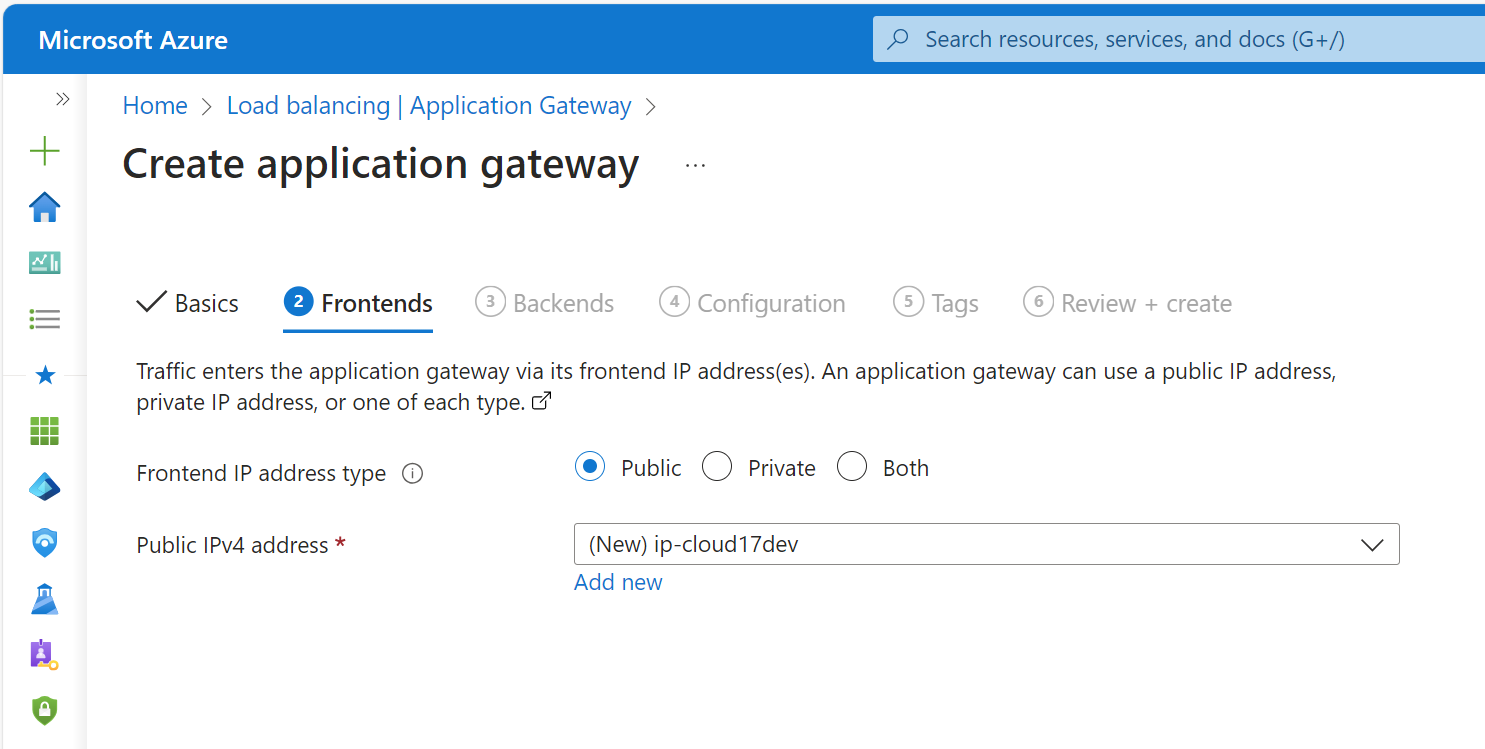
In the Frontends tab, create a new frontend IP address for the Frontends configuration:
-
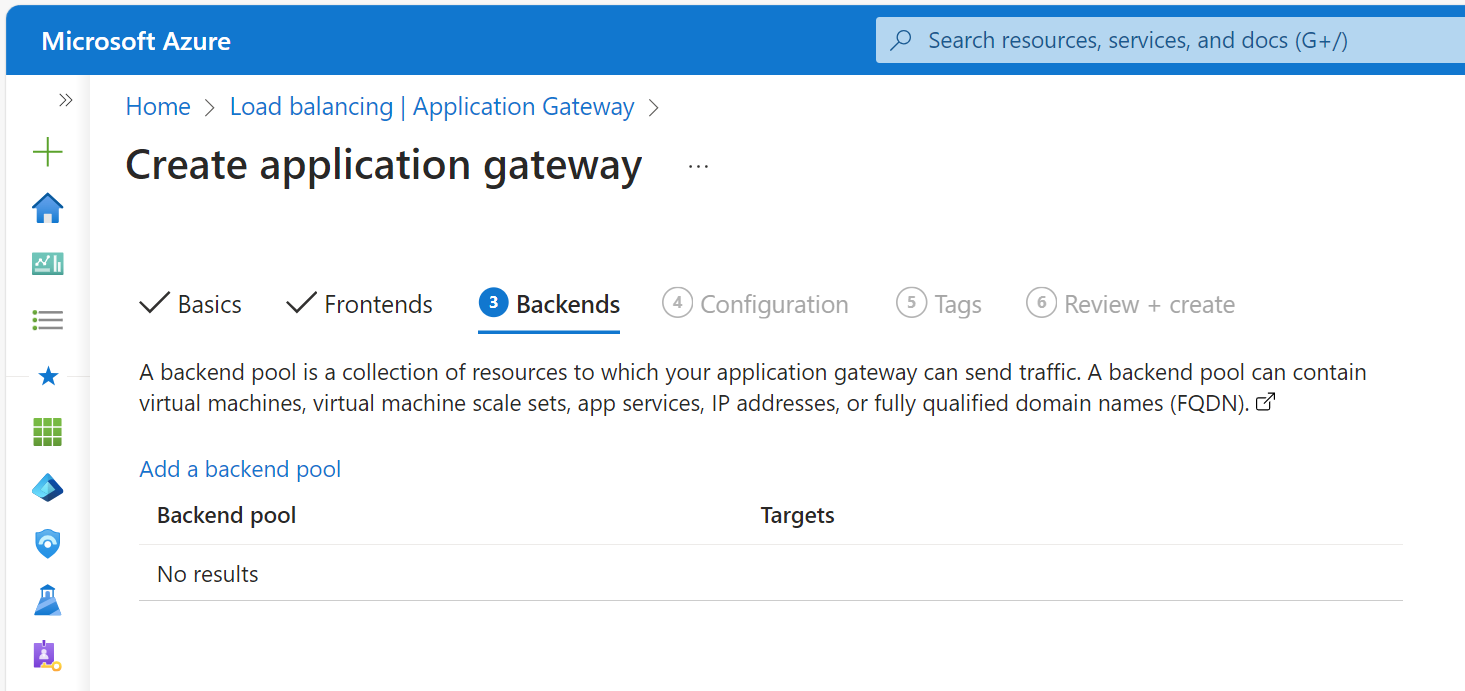
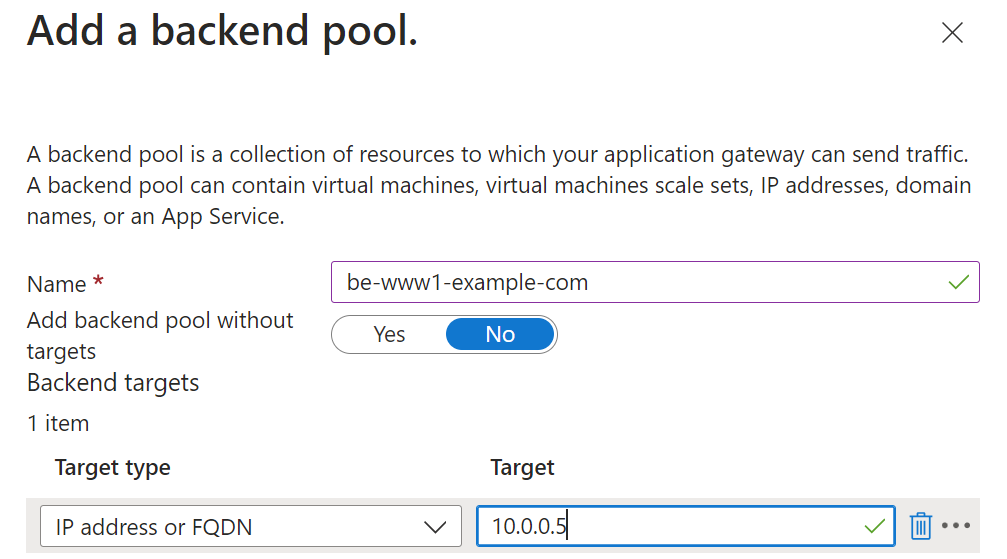
In the Backends tab, create a new backend pool and add the backend service you want to route traffic to (e.g. the private IP address of a virtual machine):
-
In the Configuration tab, enter details for a new Listener, ensuring to use the “Multi site” type and add the domain name you want to use for this backend service:
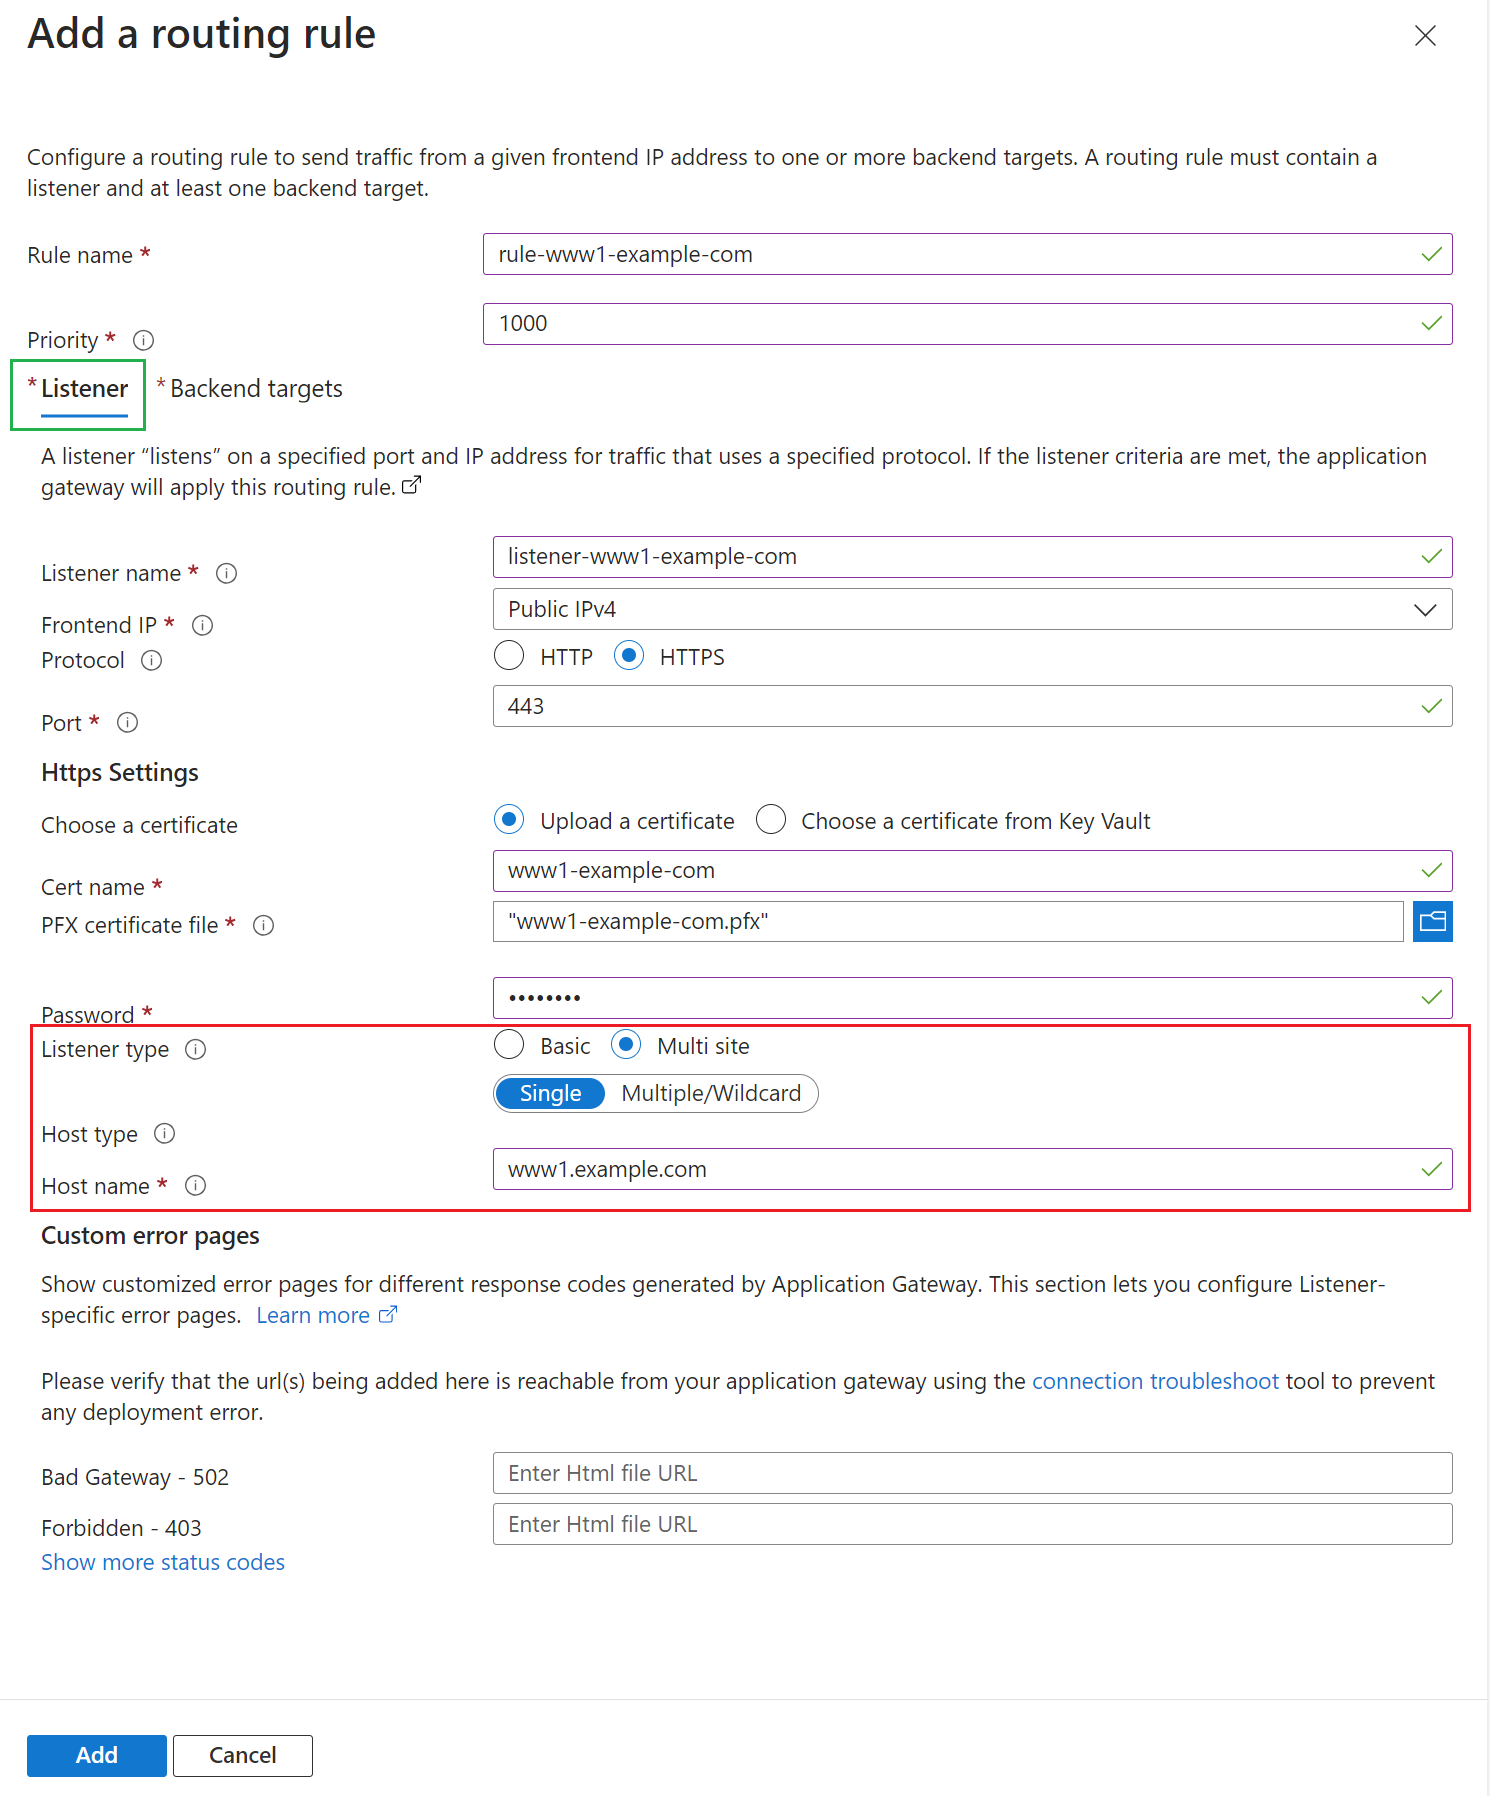
NOTE: Not setting the type to “Multi site” will restrict you to only being able to set up a single listener per incoming port, which in turn makes it not possible to route to different hosted domains with individual SSL certificates.
-
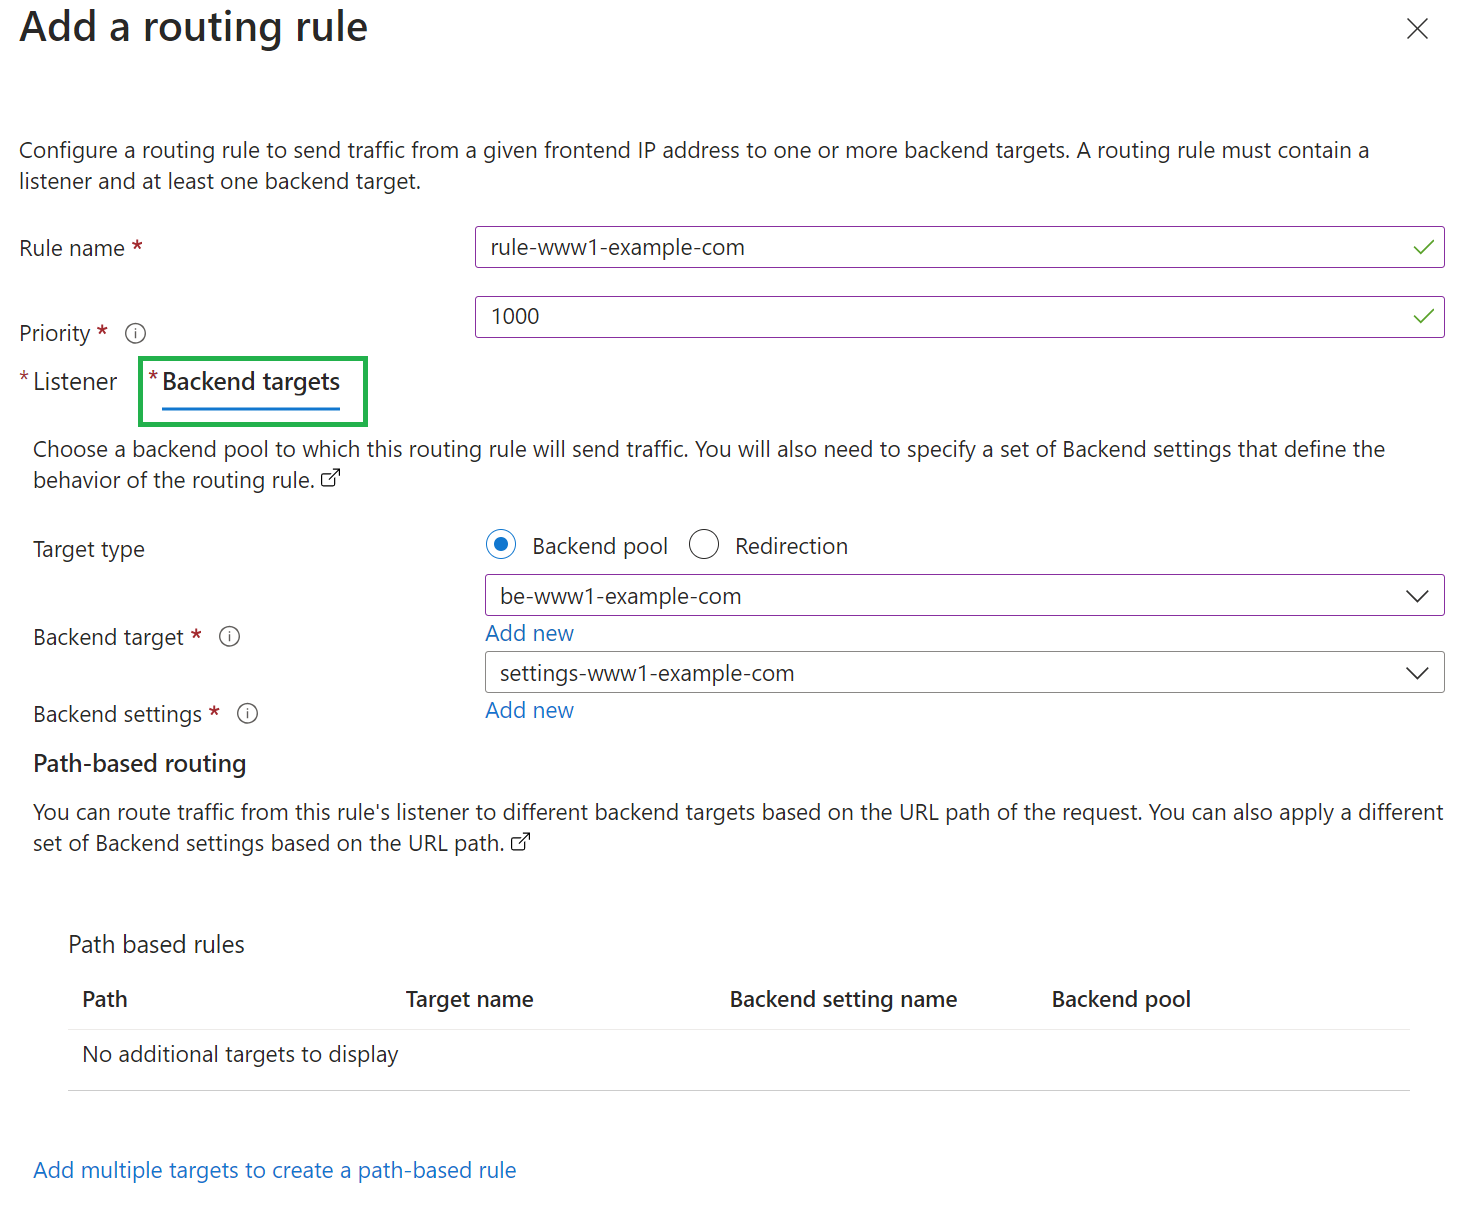
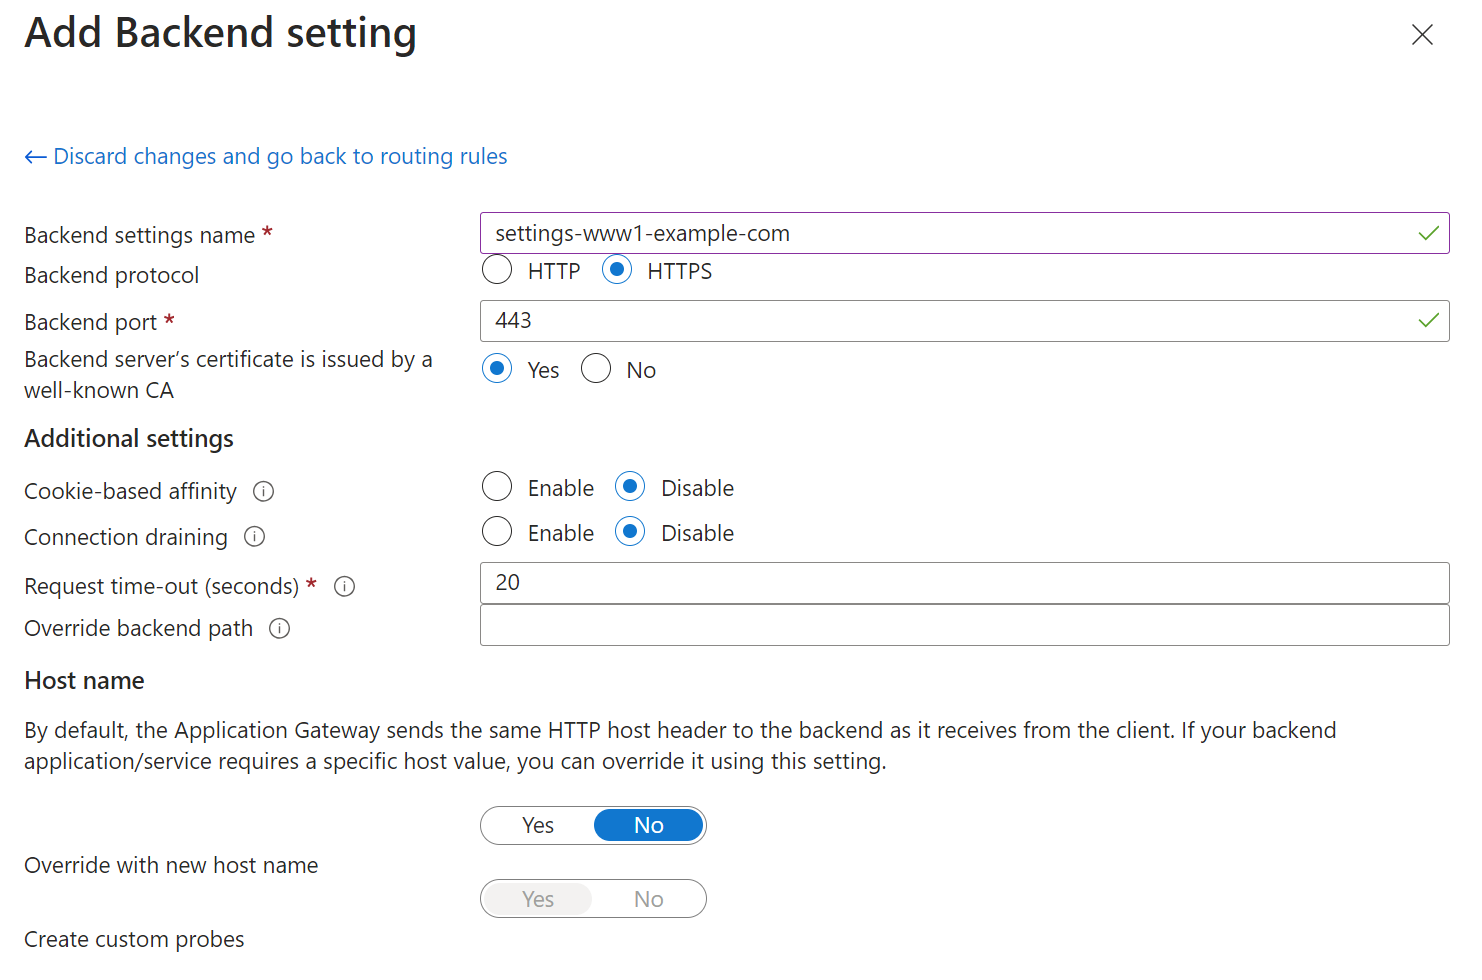
In the “Backend targets” tab, select the backend pool you created in the previous step and create a new “Backend Settings” entry:
-
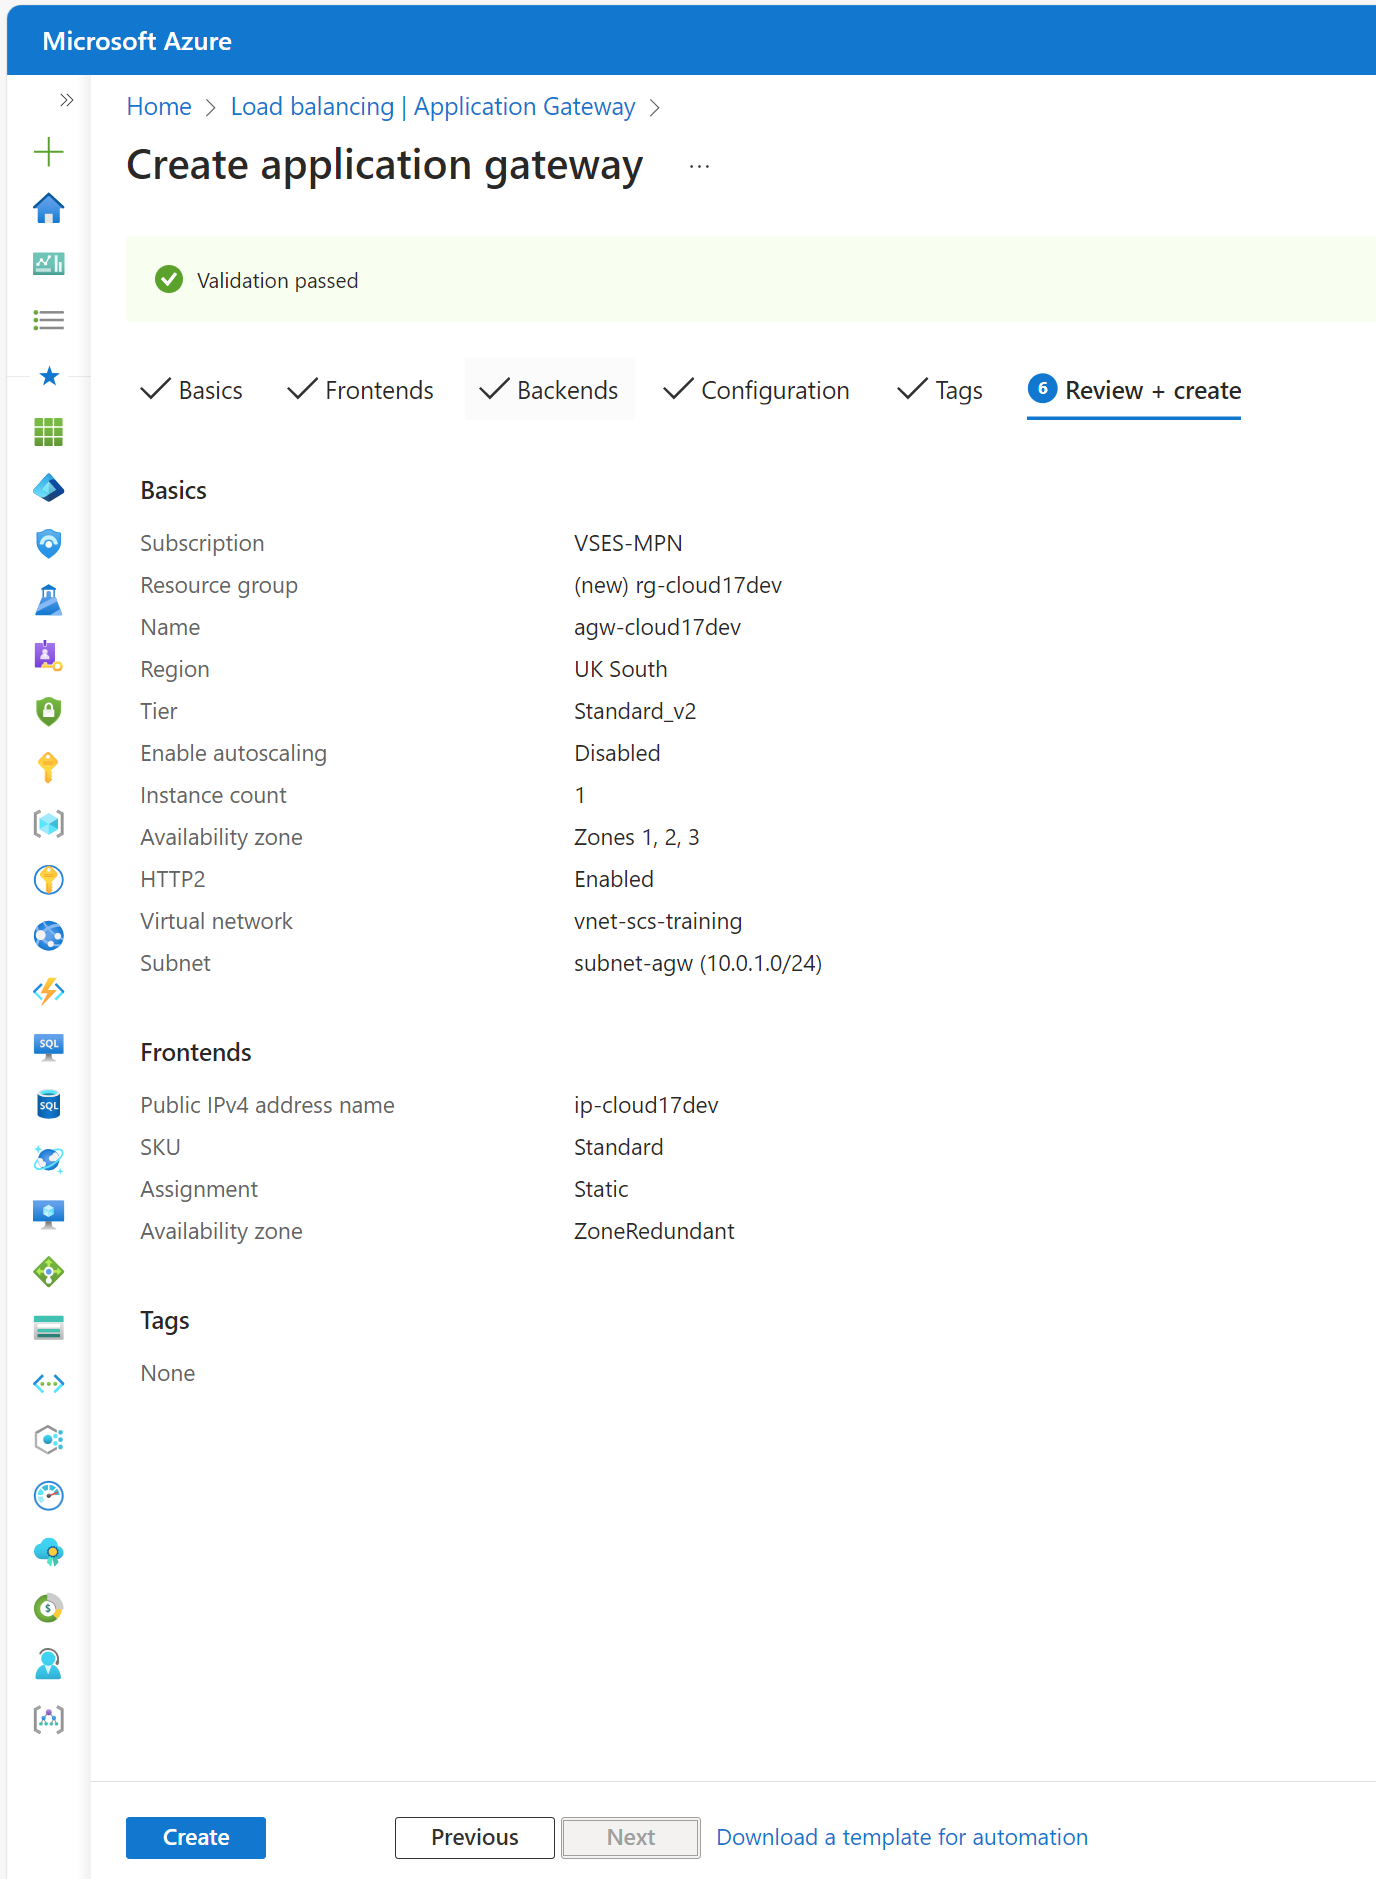
In the final tab, Review + Create, review the configuration and click Create to deploy the Application Gateway:
-
Finally, add a DNS record in your domain admin portal for the domain name you used in the listener configuration. The exact steps will vary depending on your DNS provider, but you will need to create an A record that points to the public IP address of the Application Gateway. (If a DNS record already exists for the web server, i.e. because it was previously hosted on a VM with a public IP address, you can simply update the record to point to the Application Gateway’s public IP address instead):

Step 2: Add Additional Backend Pools and Listeners
-
Once the Application Gateway is deployed, navigate to the Backend pools tab and add a new backend pool for the second backend service you want to route traffic to:
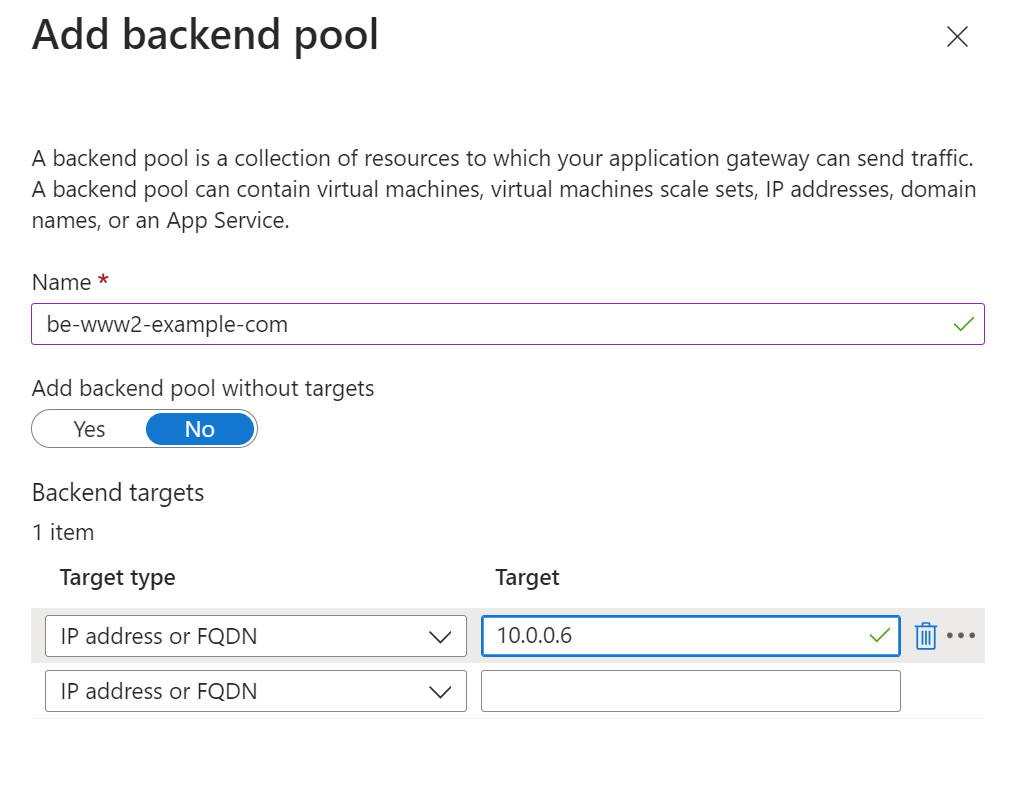
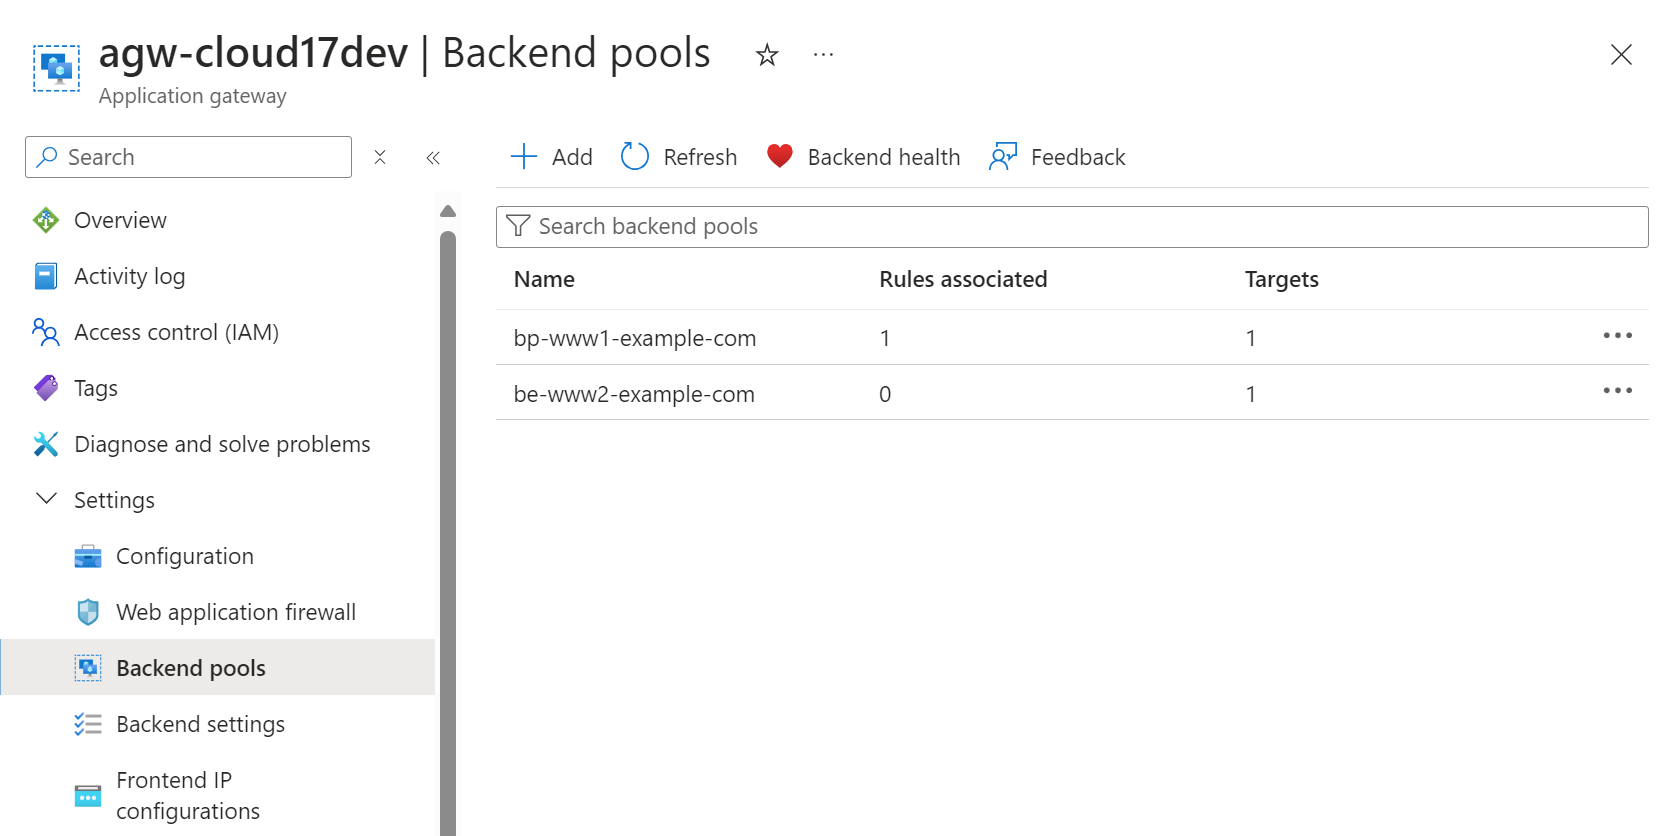
You should now see two backend pools listed:
-
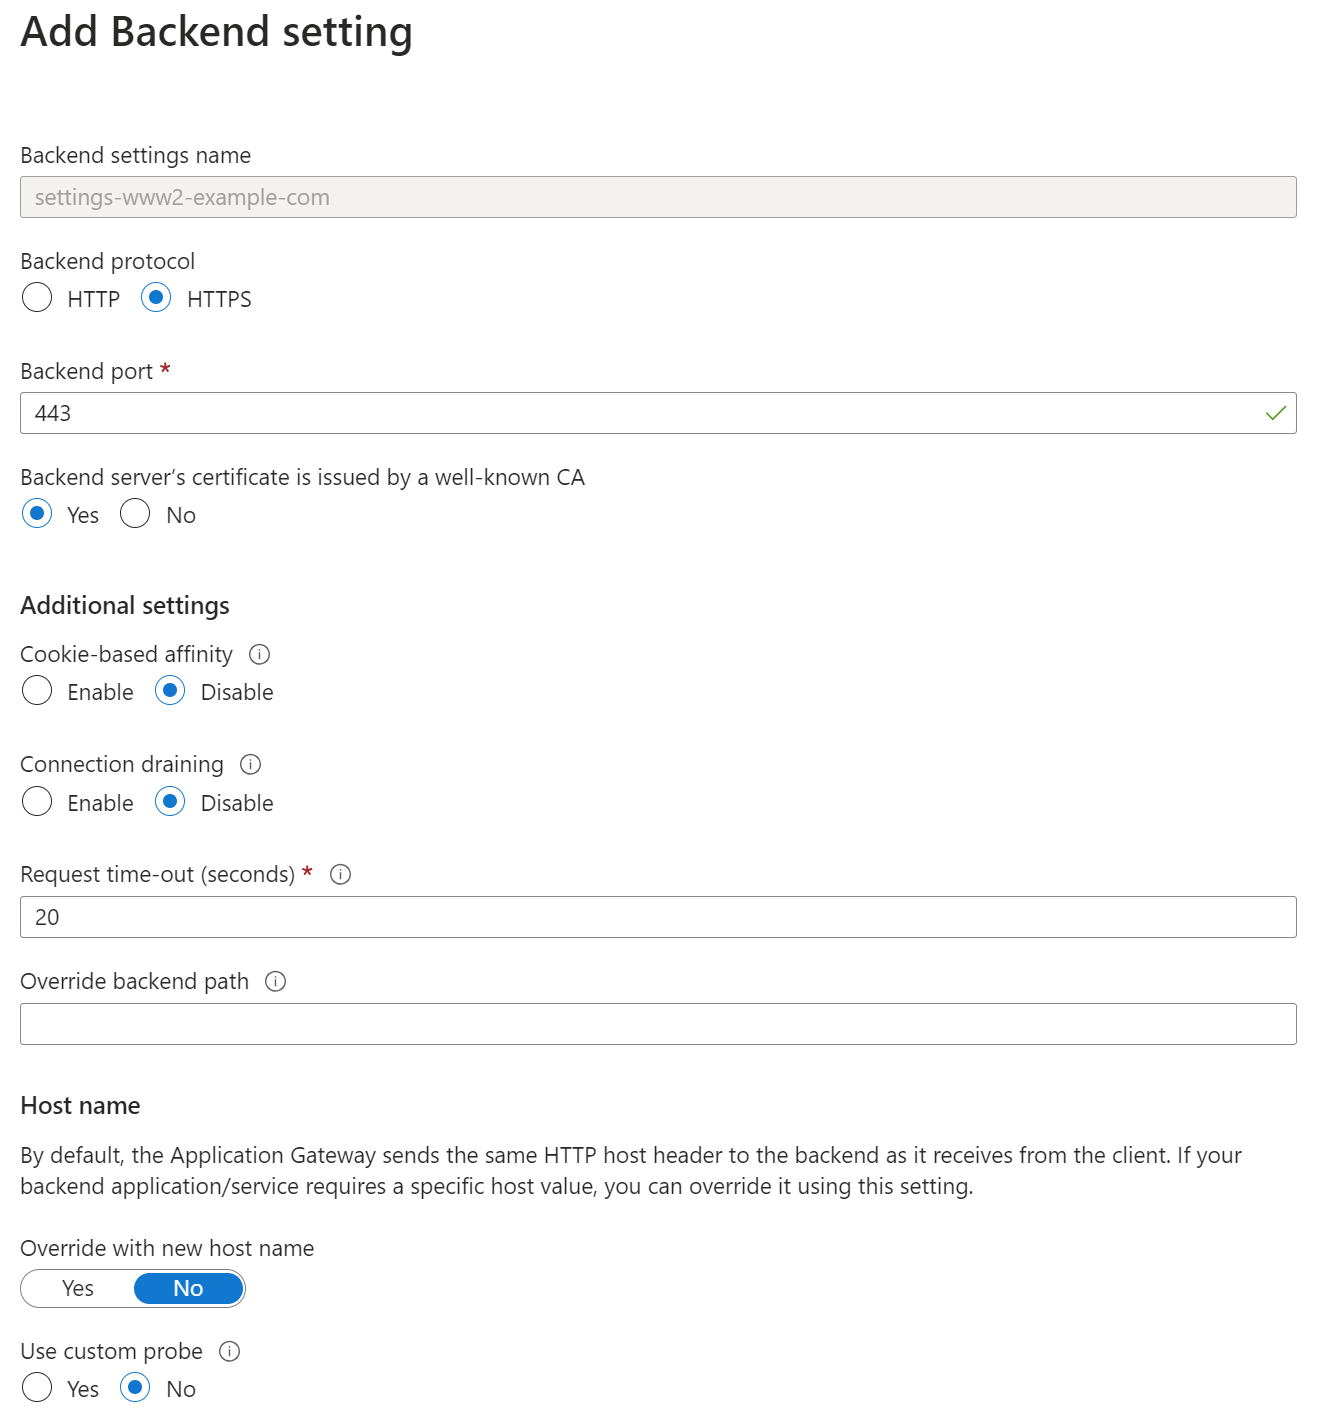
You can then optionally add a new backend settings configuration, although the settings created above are likely to be suitable for the new backend pool:
-
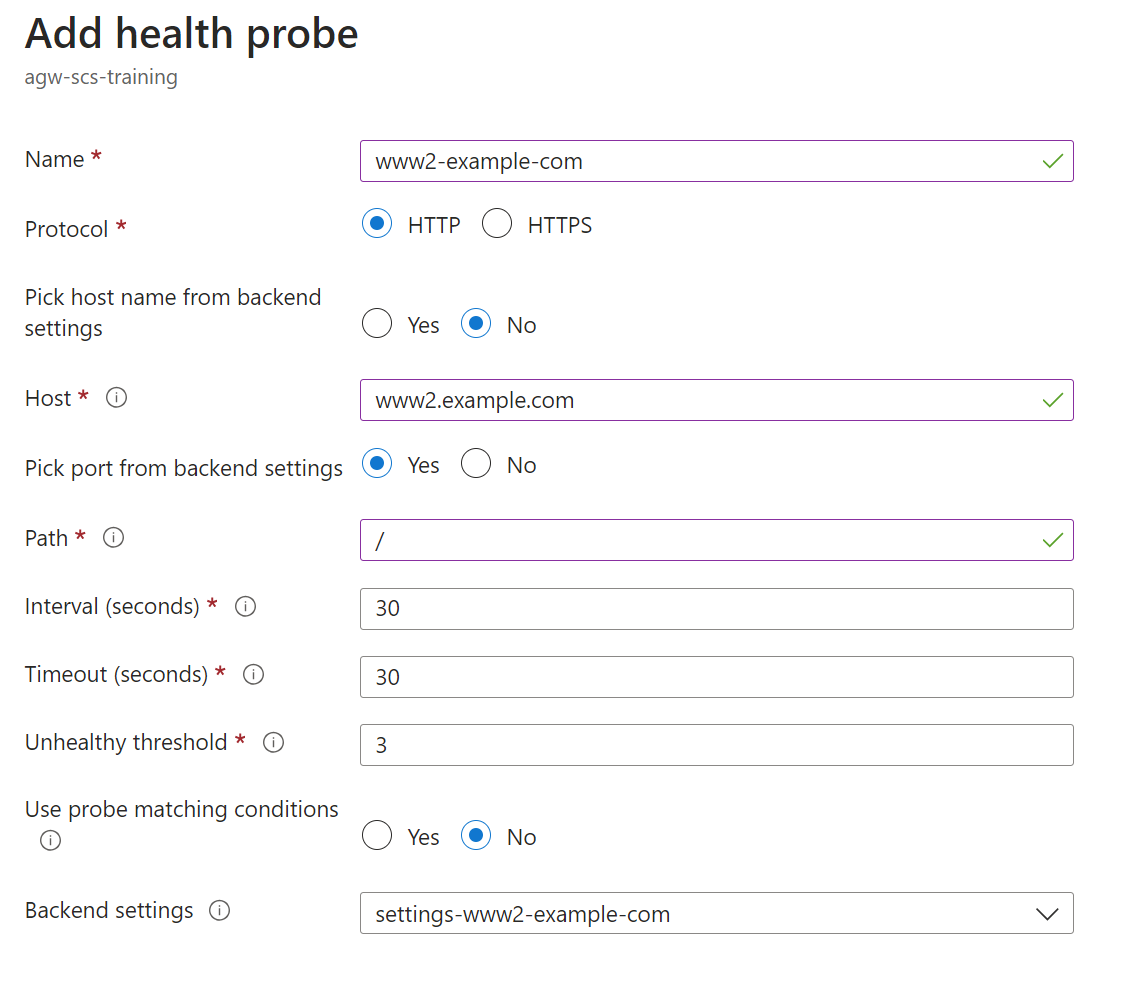
Next, create a new Health probe for the new backend pool; this enables the Application Gateway to check the health of the backend service to ensure that traffic is only routed to healthy instances. Pick the new or original backend settings configuration as required:
-
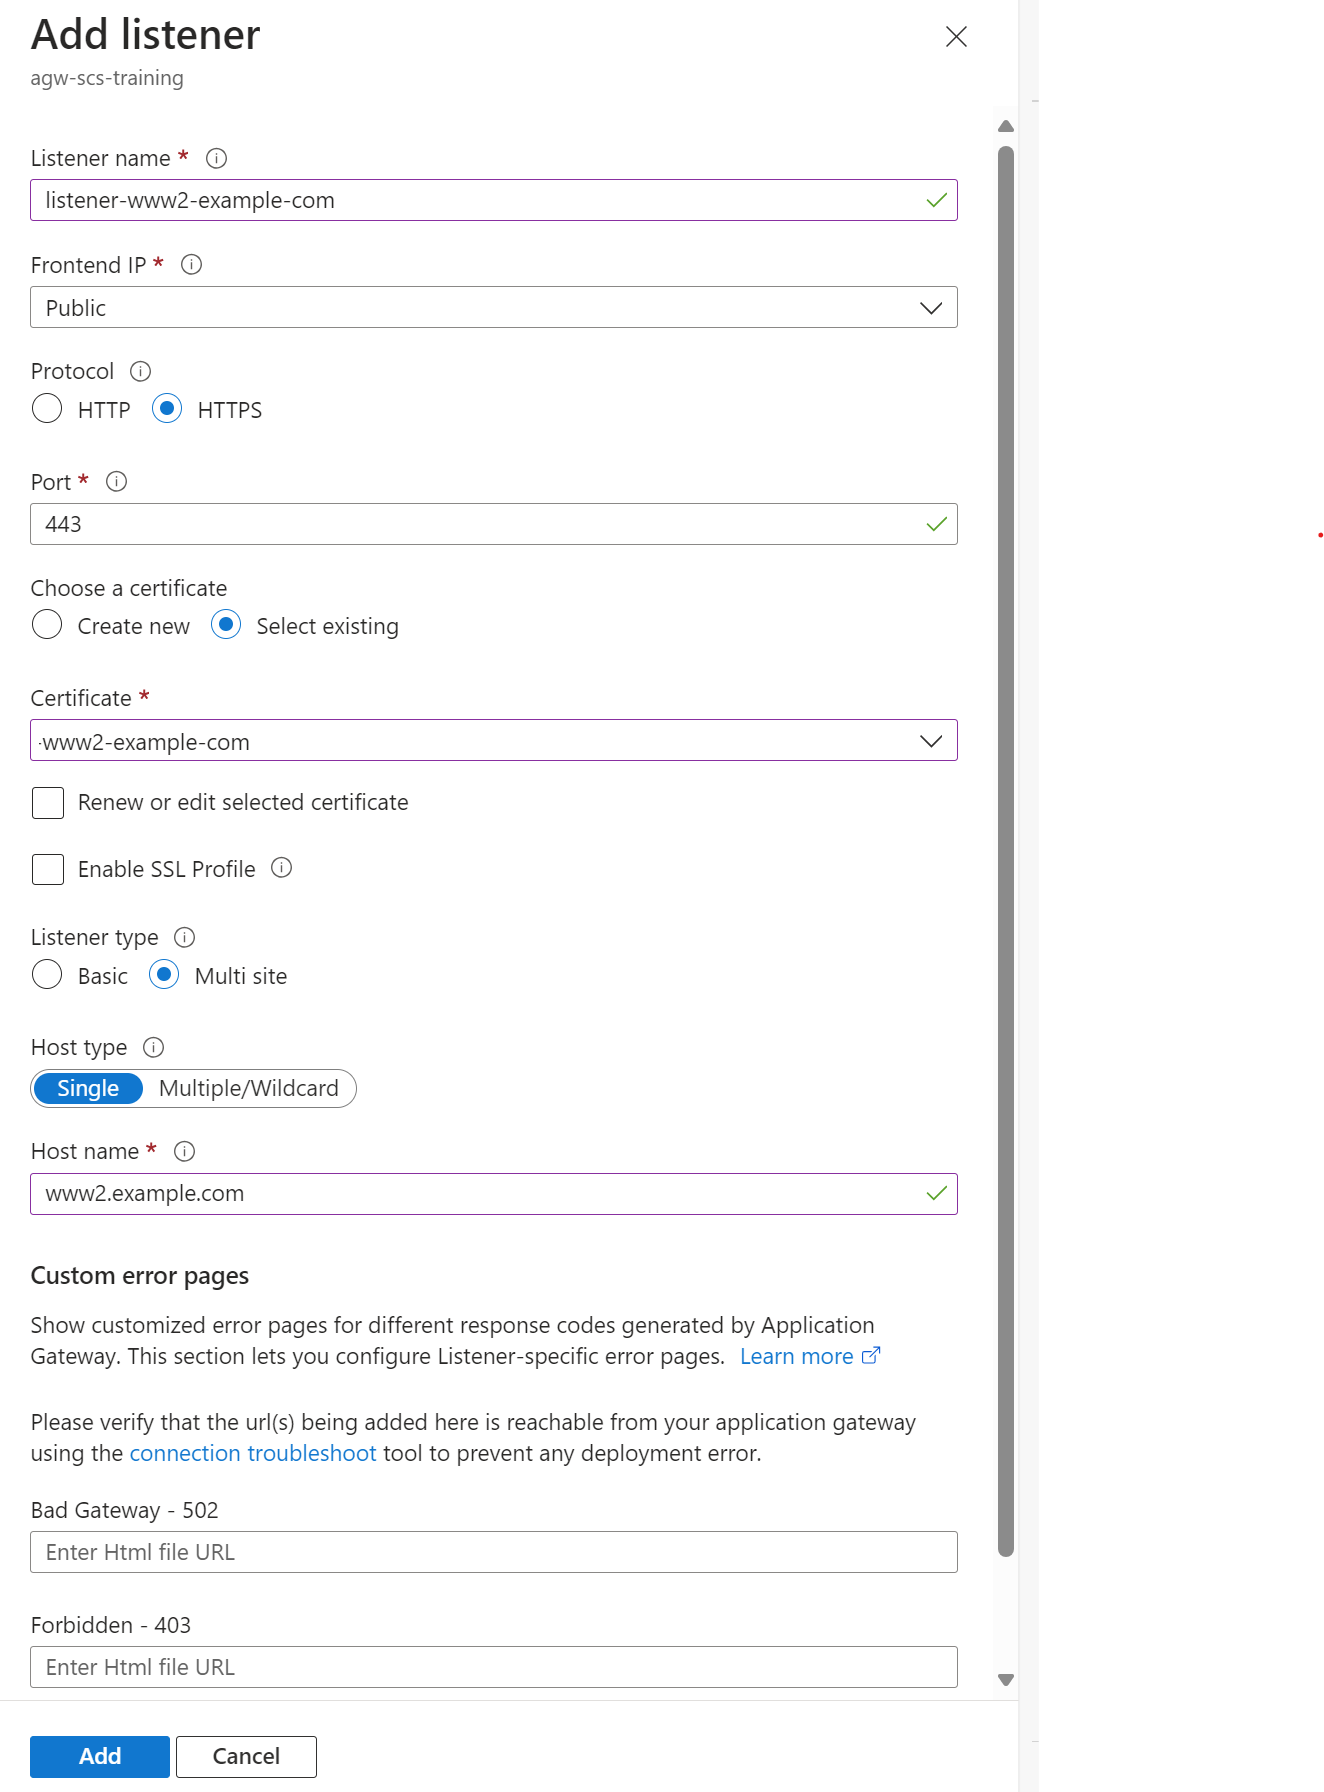
In the Listeners tab, add a new listener for the second backend service, ensuring to use the “Multi site” type and add the domain name you want to use for this backend service. Again you will need to supply the relevant SSL certificate for the domain:
-
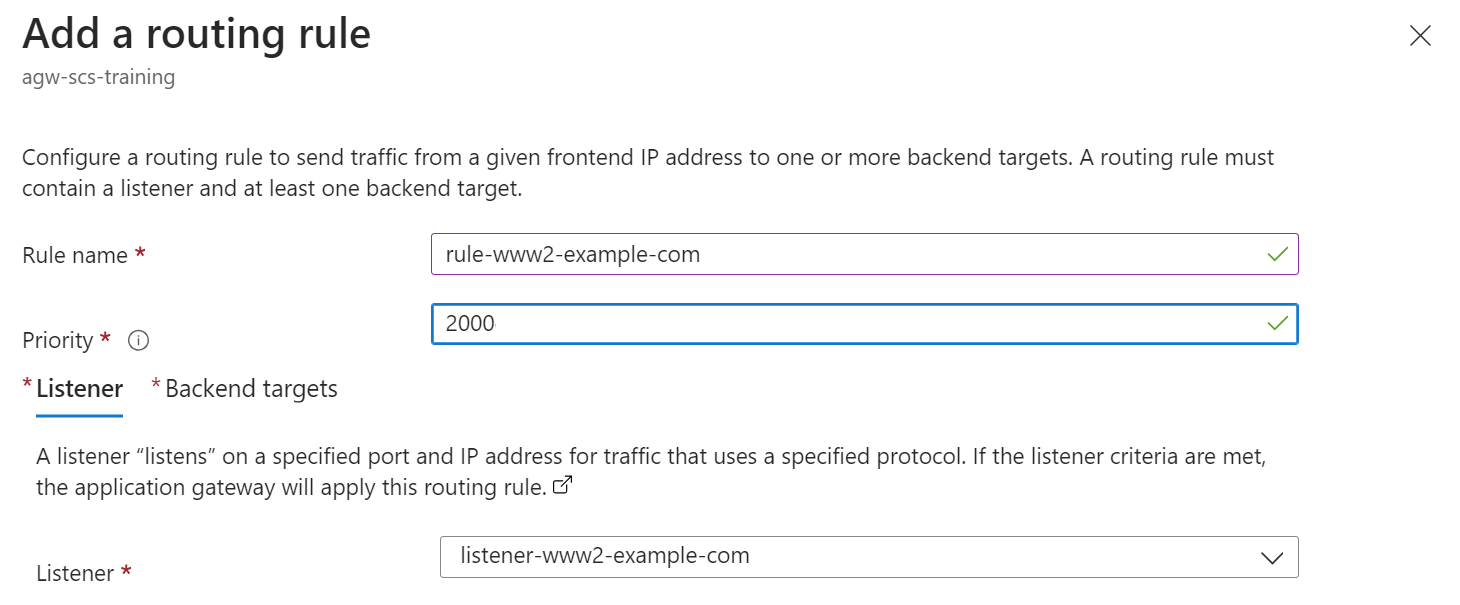
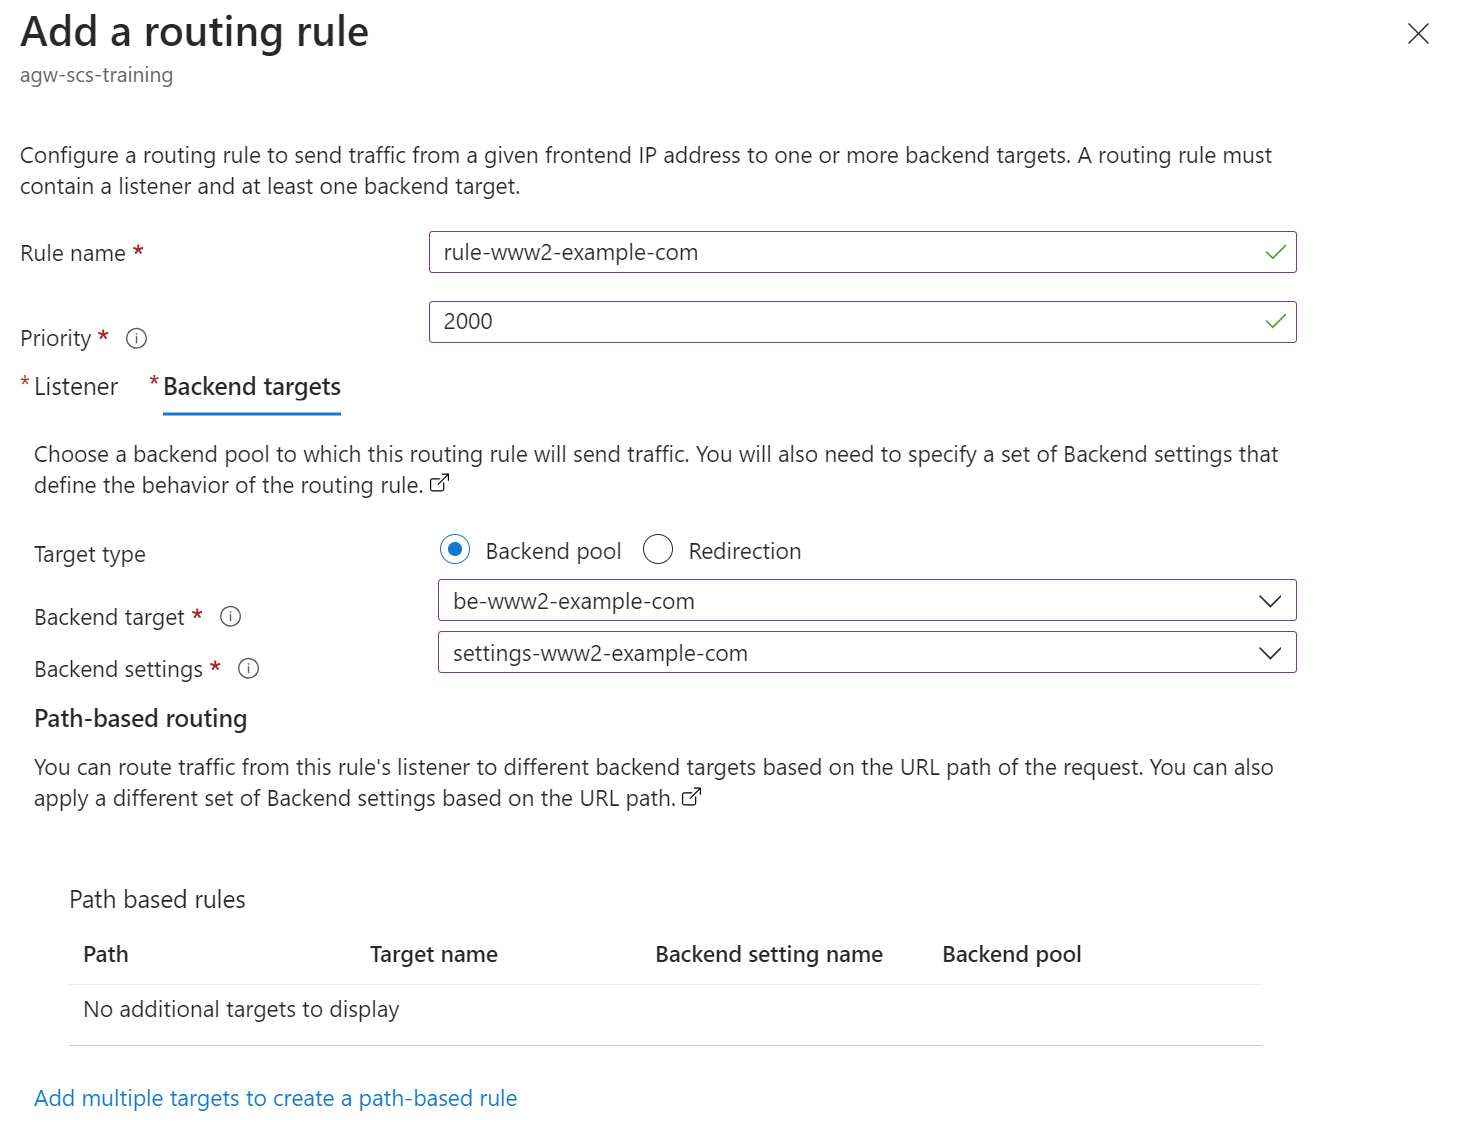
Finally, add the routing rules that will direct traffic to the correct backend pool based on the domain name in the request:
-
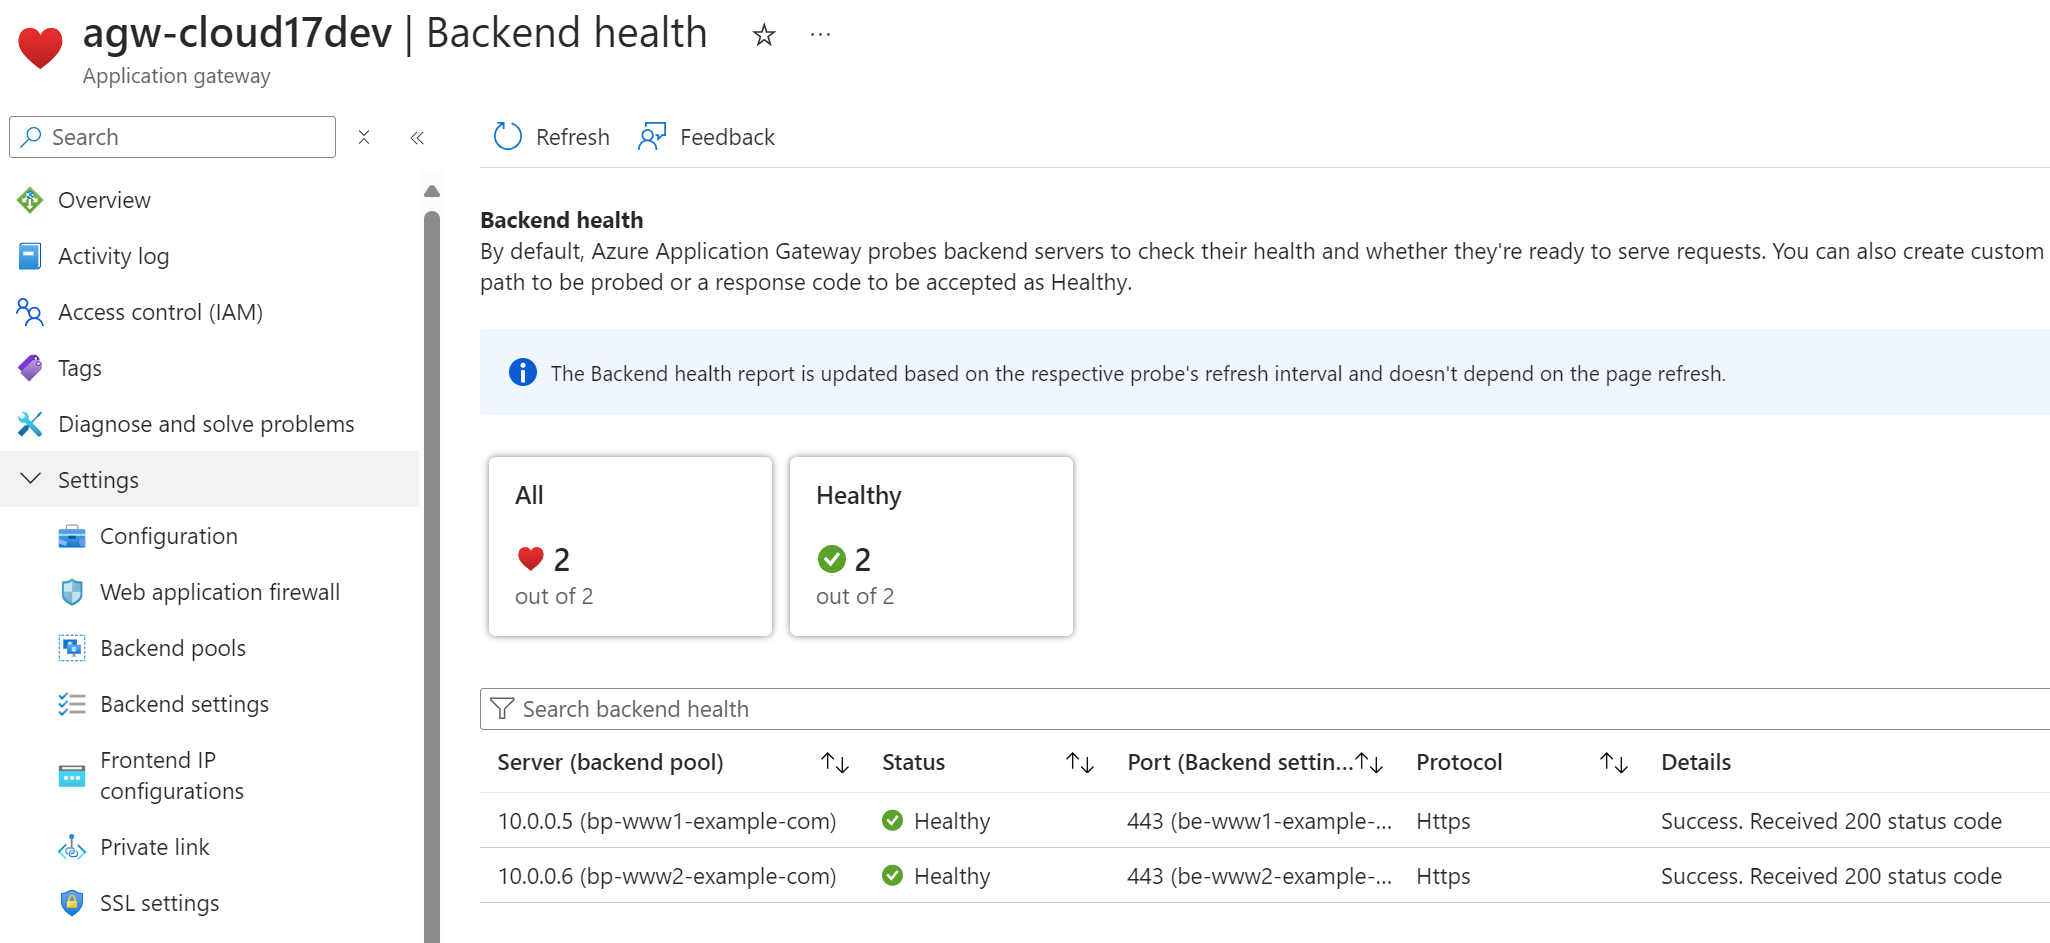
Once you have added the new backend pool and listener, you can check that the backend health is OK for both backend pools:
Extracting the SSL Certificate from an Existing Virtual Machine Web Server
If the backend service is a virtual machine running Apache (as per the instructions here) or Nginx, you can extract the SSL certificate from the server using the following steps:
- SSH into the virtual machine
-
Run the following command to extract the SSL certificate and private key:
sudo openssl pkcs12 -export -out www1-example-com.pfx -inkey /etc/letsencrypt/live/www1.example.com/privkey.pem -in /etc/letsencrypt/live/www1.example.com/cert.pem -certfile /etc/letsencrypt/live/www1.example.com/chain.pem - Copy the
www1-example-com.pfxfile to your local machine:
- If you have SSH access to the VM, you can use
scpto copy the file to your local machine -
First, make the file readable by the current user:
sudo chmod +r www1-example-com.pfx… then, from your local machine, use SCP to pull the file down:
scp username@xxx.xxx.xxx.xxx://home/username/www1-example-com.pfx www1-example-com.pfx
where values for username and IP address are those of the VM.